Go Fishing With German Efficiency

FOLLOW US:

Fish Finders (Sonar)

Garmin-panoptix-LiveScope-review
4.7
(88)

Garmin Panoptix LiveScope - The Magic Box?

We have become used to not always being able to cleanly separate advertising from factual information about new publications.

When the “LiveScope Sensation” was released this summer, you could expect the superlatives to overflow in the product presentations.

On closer inspection, the “info” usually didn’t differ much from the Garmin press release, and Garmin’s revolutionary video images were partly supplied at the same time.

So what's the deal with the Garmin LiveScope?

We wanted to verify it and were on the water with the system.

Essentially, the Garmin LiveScope system is an extension of the existing Panoptix technology, which is now designed to realize video-like images of structures and fish under and alongside the boat in real time, up to a depth or distance of 60 m.

Under favorable conditions, even photo-realistic display and identification of fish species will be possible.

On the hardware side, the required technology is contained in a 2 kg black box with the designation GS10 and a special LVS32 transducer (0.9 kg), which can be attached to either the electric motor or the rear of the vehicle. The black box is supplied with power separately.

The power consumption of around 1.8 A/h in normal operation indicates a high computing power, which is necessary for the generation of the video-like images. Since LiveScope does not provide a display option, a network-capable Garmin fish finder from the Echomap or GPSMap series is also required.

The good news is: Any network-compatible Garmin combination device can be upgraded to LiveScope with the black box and the transducer. The connection is made via network cable, the installation is done immediately with plug and play.

The less good news: Those who use their system flexibly – i.e. transportably – have to lug along additional hardware and provide plenty of power. There are solutions for such cases as well.

We will introduce one in part 2. But first to the test.

Our test configuration of the Garmin LiveScope

Garmin-panoptix-LiveScope-Echomap-92sv
The Echomap Plus 92Sv combo unit on the left, which was used for this field test. On the right is the LiveScope unit. Not shown is the Gt52-TM Chirp transducer, which was used in parallel.

We used the Garmin LiveScope with an Echomap Plus 92sv. For this purpose, the complete unit with separate power supplies for the black box and the fish finder was installed in a large outdoor case, which was used for both sonar mounting and transport.

The LiveScope transducer came together with the GT52 Chirp type of the Echomap Plus 92sv on a stable transducer rod, so that both methods could be used in parallel. In boat operation, the transducers were mounted on the vehicle in such a way that interference from the electric motor could be ruled out.

Handling with the case and a transducer stick was generally little different from normal sonar operation, except for the fact that more weight had to be moved.

How the LiveScope technology works

With normal sonar images we see into the past, we do not know where exactly the fish is located and even the exact depth of the fish location must sometimes be doubted.

SideScan technology has also given us the possibility for the first time to be able to see where we find the fish in relation to the boat’s position, and with DownScan we now also look under the boat.

LiveScope now opens up new horizons. The magic word is once real time. It is now exactly the actual condition that we see on the fish finder image. On the other hand, an abundance of high frequencies in the range 530-1100 Khz are transmitted, which show structures and fish in detail.

While the chirp method uses a series of pings at different frequencies, the LiveScope system, with its special transducer format, blows the multi-frequency block into the water all at once.

The three different ranges of the transducer, which fan out idiosyncratically in the transducer shape, make it possible to be active on three different transmission ranges simultaneously.

Garmin-panoptix-LiveScope-transducer
The special transducer shape of the LiveScope system (fan format)

All information is collected in the central unit, the GS10 black box, where it is extrapolated into an image on the screen. Given this process technology and the minimal time delay (real time), the need for high computing power and the associated energy requirements become obvious.

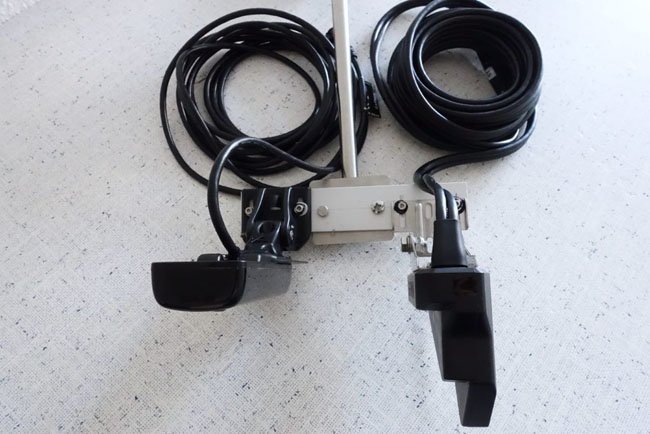
Another special feature of the transducer, being able to work in two different perspectives, is an additional highlight. LiveScope Forward scans the conditions next to the boat, while LiveScope Down looks below the boat.

Automatic switching between the two scanning methods is possible at any time via touch on the compatible Garmin chartplotter. If the transducer is attached to the trolling motor, it can also be individually aligned depending on the water conditions and type of fish in order to achieve optimum scanning results in the respective areas of application.

While in traditional echosounding the boat has to “drive”, usually between 3-5 Kn for good results, the LiveScope technique produces convincing images both at speed and at standstill.

And in rough water conditions, the built-in AHRS (Attitude Heading Reference System), as a kind of image stabilizer, ensures detailed representations of underwater structures, lures and fish in such conditions.

A lot of technology, and a promise to provide photorealistic live sonar images that go well beyond what has been available in the past.

LiveScope in practical use

Well, our test at the Sorpestausee lake in the Sauerland region went just as we had hoped.

The system was easy to set up, the Garmin network connection was completed immediately thanks to Plug&Play. The dual transducer equipment produced the desired images right away. Both in parallel with 2-D and with the Structure Scan capabilities of the Echomap GT52-TM transducer, there were no problems.

Even in 800 Khz mode, there was no interference with the LiveScope images. More interesting than these rather technical experiences were the LiveScope results on the screen.

It was exciting to experience the underwater world in real time mode and to know exactly that the fish signal on the fish finder reflected the exact position under or beside the boat.

Garmin-panoptix-LiveScope-Simulator
The practical test showed that the quality of the images in practice can always be compared with those produced by the simulator. This can be seen well in the comparison. The screenshot with the school of fish from the water is apparently even sharper and more detailed in the image. It is also interesting that no fish can be seen in the 2-D chirp image.

With the e-motor it was possible to follow the fish without any problems and thus always maintain the optimal boat position. This would hardly be possible with a traditional fish finder, even with side and downscan help.

For control, a 45 g pike cigar with an upstream Water Wolf underwater camera was then lowered into the water and towed along. Both the lure and the Water Wolf cigar were clearly visible on the LiveScope image. There is no need to go into detail about the advantages of having one’s own lure and the detected fish on the screen in exact position.

Already the possibilities to test whether reactions to the bait occur and at what distance they occur to the fish location would visibly increase the fishing success and reduce wasted fishing time.

Next, we wanted to know how well fish detection worked in LiveScope and worked with split screen and 2-D chirp in parallel. First, it is noticeable that the bottom gradient often differs in both scanning methods.

On the one hand, this shows where the differences lie in the live image (LiveScope) and in the recorded image of the 2-D method, but it is also partly the result of different scan ranges (transmission angles) in the two methods.

In terms of fish detection, we found that fish appeared more frequently in the LiveScope image without a counterpart in the 2-D image. This may be due to the spatial displacement of both scanning techniques, but should then also have resulted in the reverse constellation, which we could not observe.

Fish were usually represented as more or less large dots or small areas. The movement of the individual objects made it easy to recognize that they were fish.

The fish display is very similar to the one we know from the previous Panoptix technology.

Inspired by the Garmin video, we had secretly hoped for a little more, but quickly realized that this requires particularly favorable conditions and more practice with the technique.

First of all, the size of the fish object must be in the meter range for resolution reasons, and the distance to the transducer must be suitable. When the ratio is correct can be seen in the depth data of the Garmin video.

For our freshwater area and our fish populations, comparable recordings are not known to us so far. Perhaps this is also a reason why a man was sent into the water for the one or other practical demonstration of the LiveScope.

While it may be spectacular to be able to spot the float on the fish finder, the LiveScope system is attractive enough to dispense with such actions.

Garmin-panoptix-LiveScope-2D-chirp
These two images clearly show how well the underwater structures turn out even in the low-structure environment of a dam, especially in direct comparison with the 2-D Chirp image. In both LiveScope images, even at this magnification scale, our Water-Wolf flasher combination is clearly visible. (arrow).

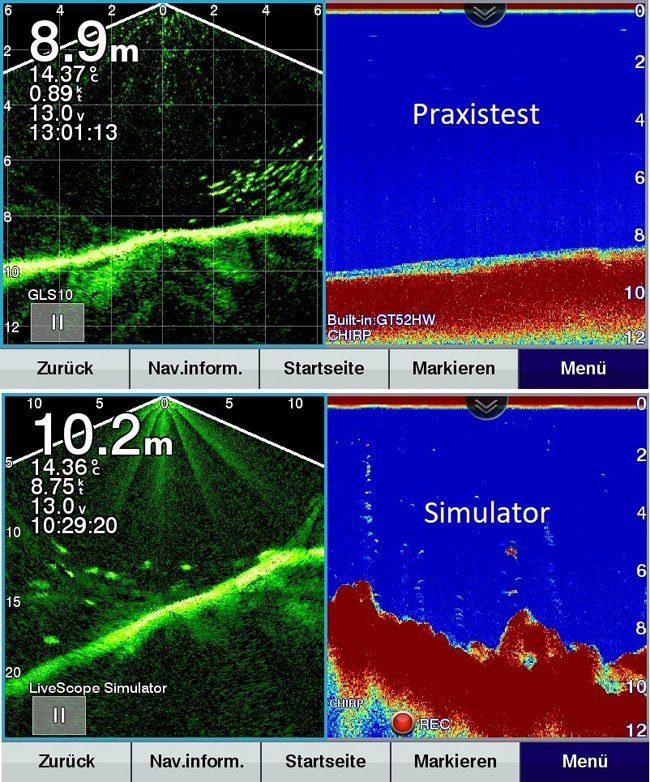
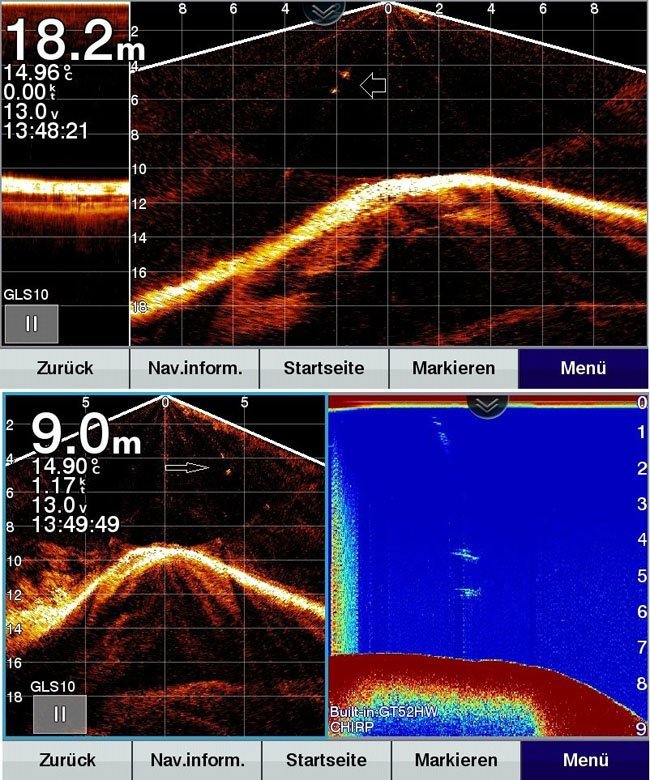
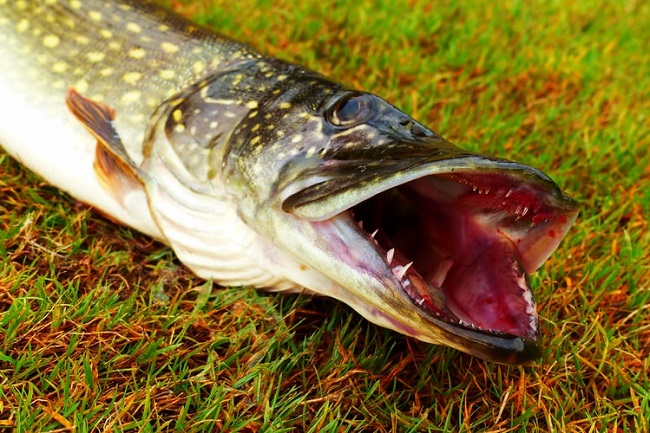
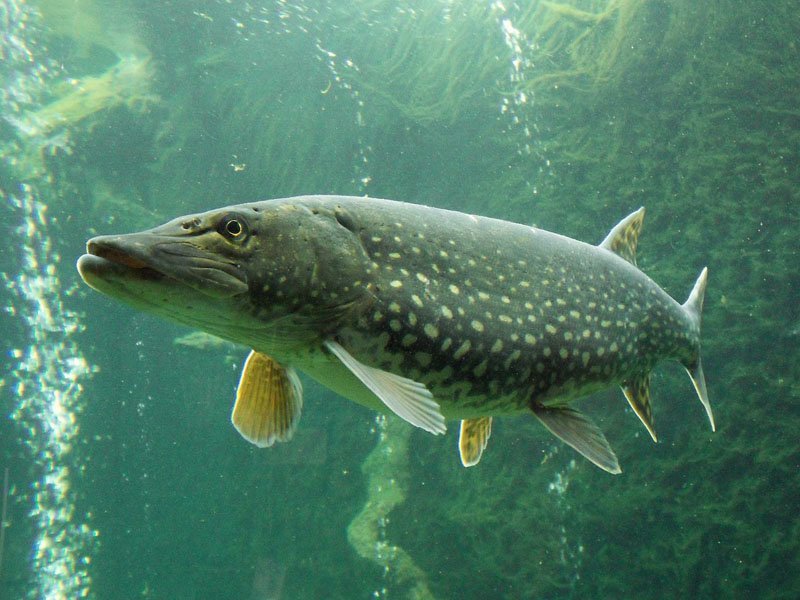
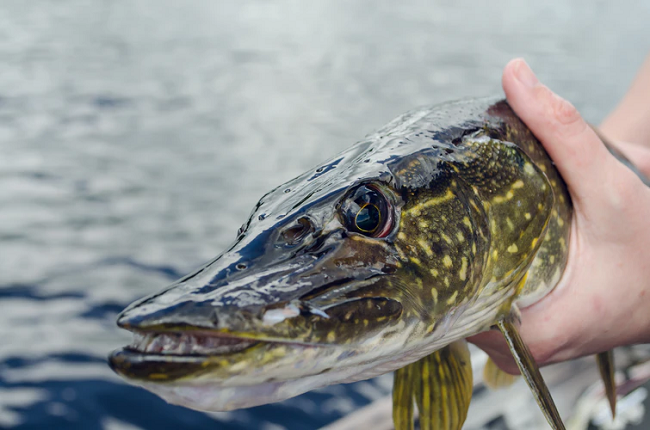
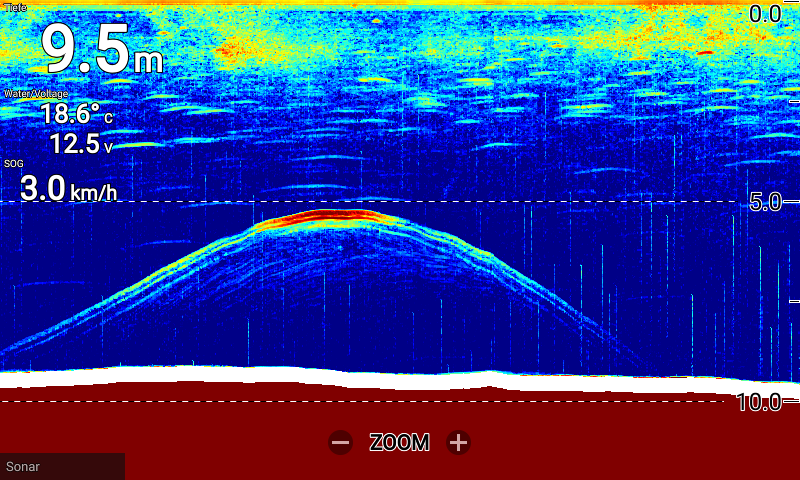
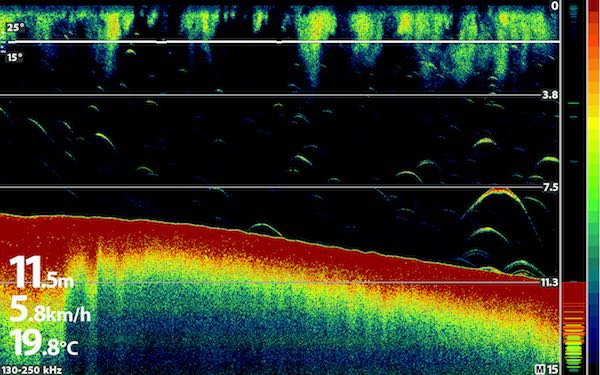
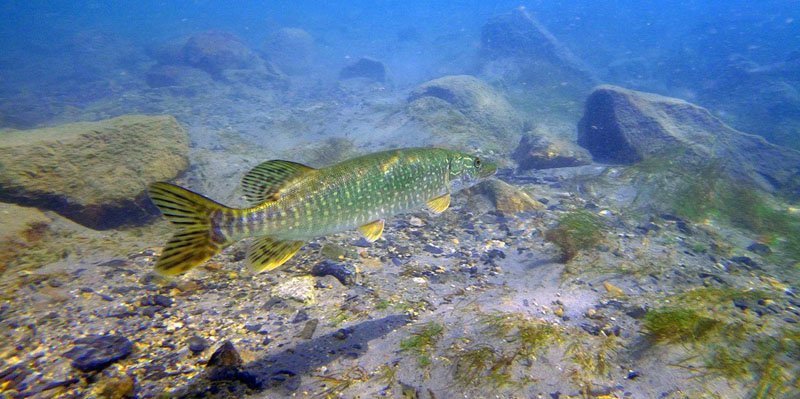
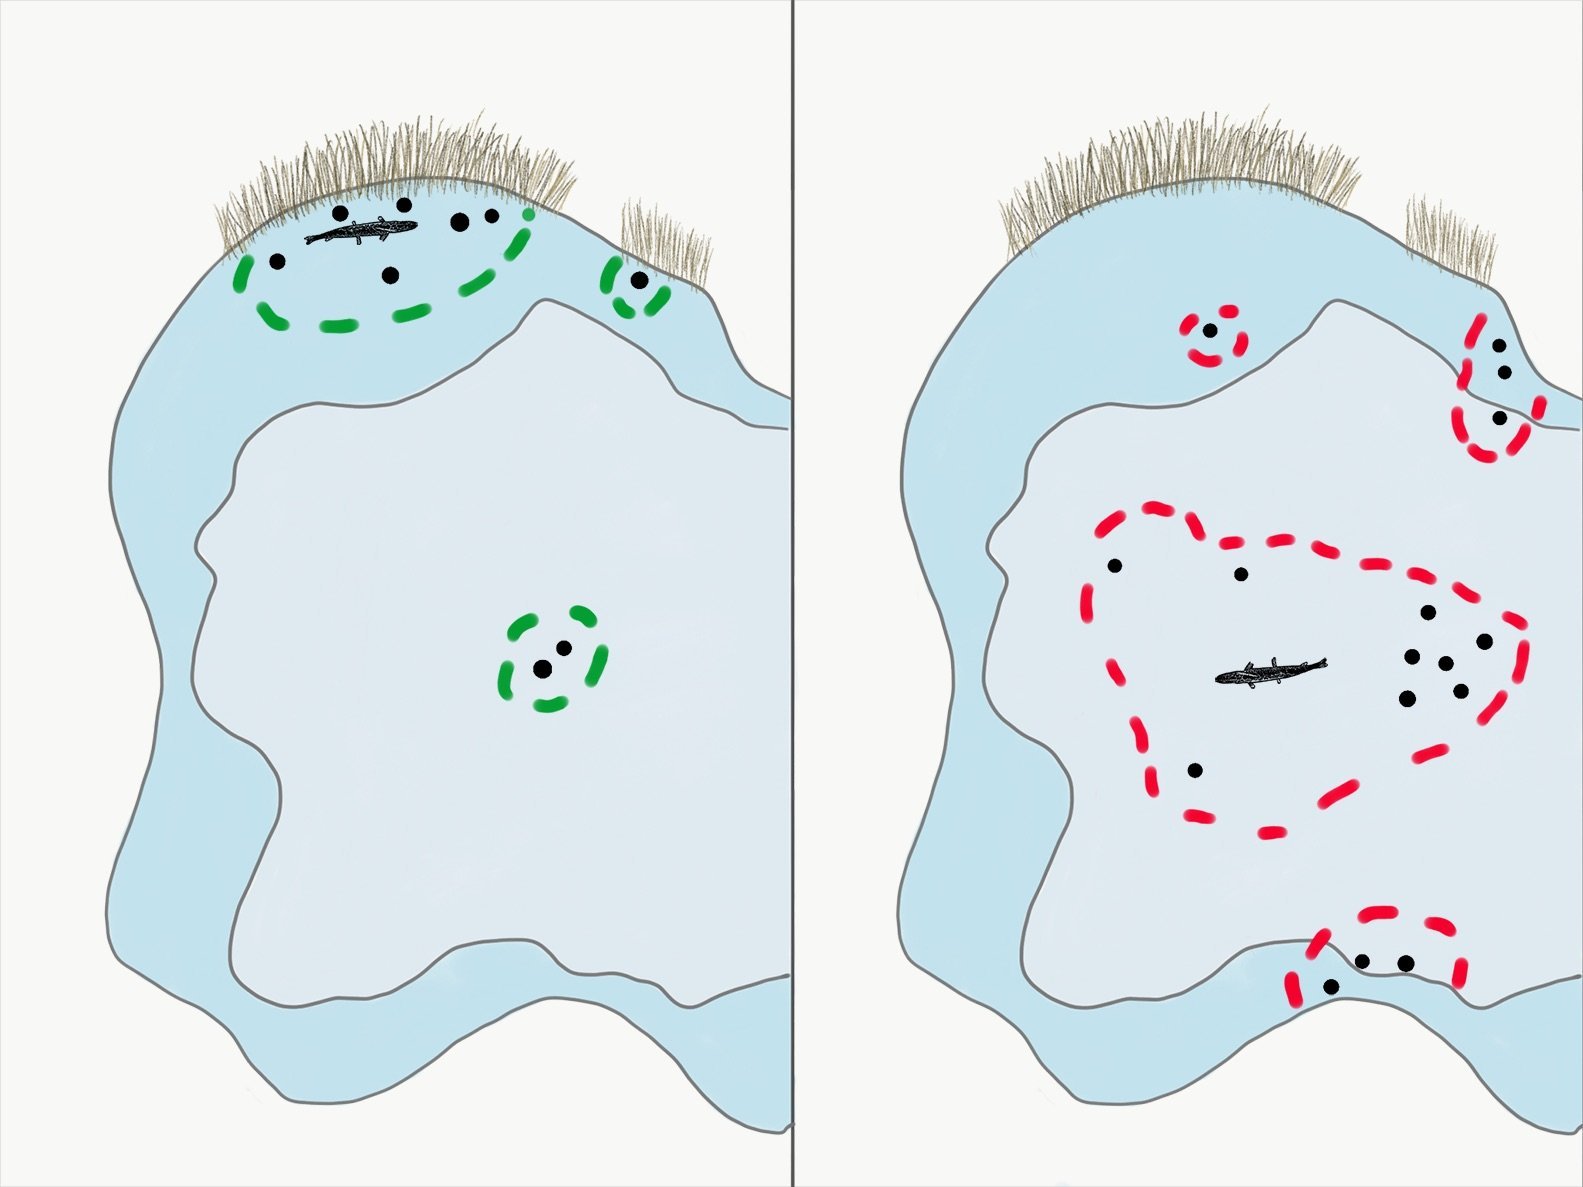
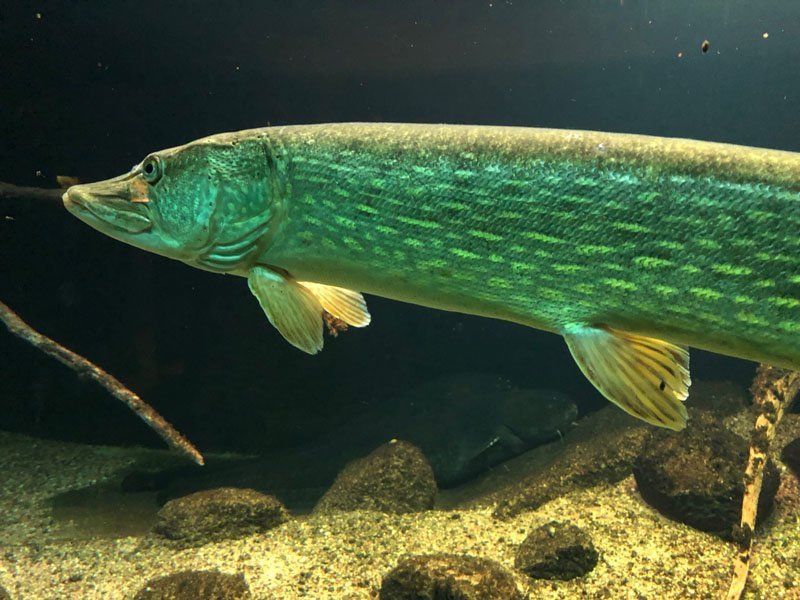
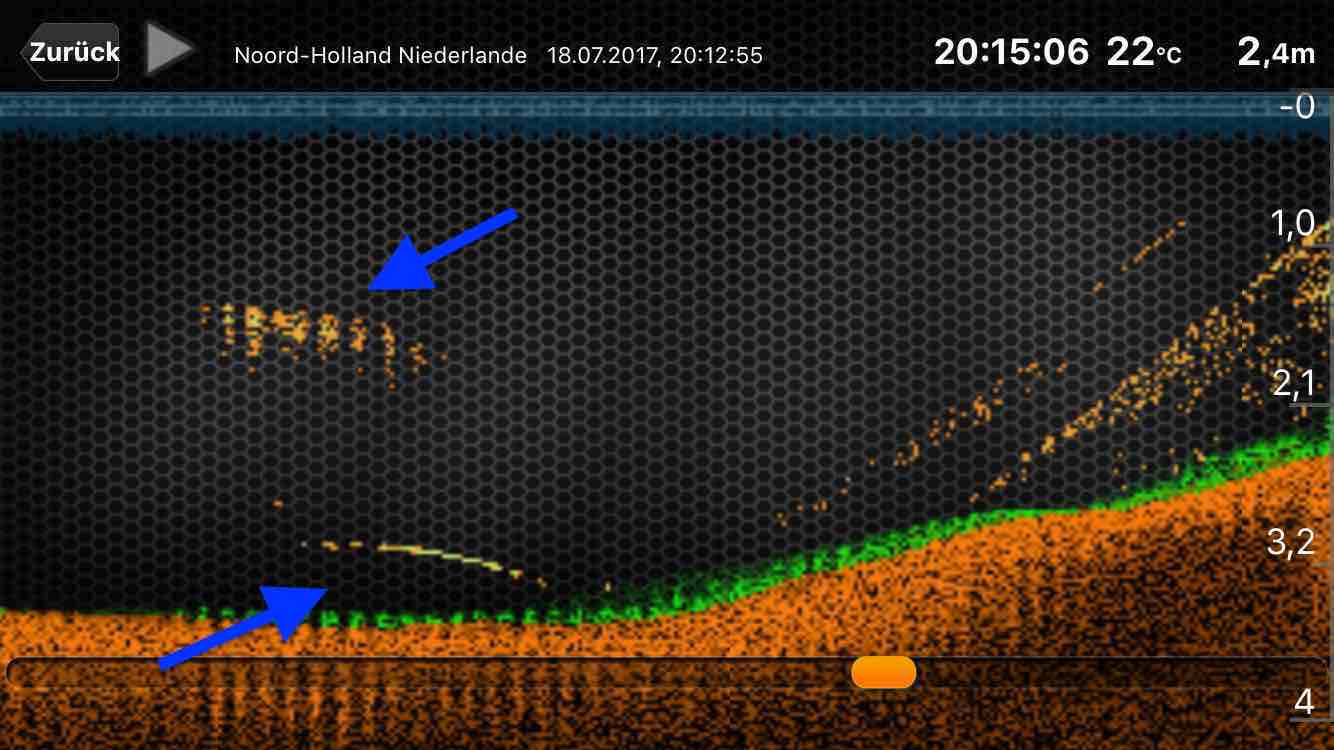
Take, for example, the underwater structures that are so important to us anglers and that have made side and downscan technology so indispensable to us up to now. With LiveScope, we are now fishing in another dimension.

Not only that the structures are displayed in great detail and object differentiated, it is the fine profiles in the form of fine vegetation shapes or shoals of bait around the hotspot that become visible in real time. This is something we have always wanted, but could not realize without LiveScope until now.

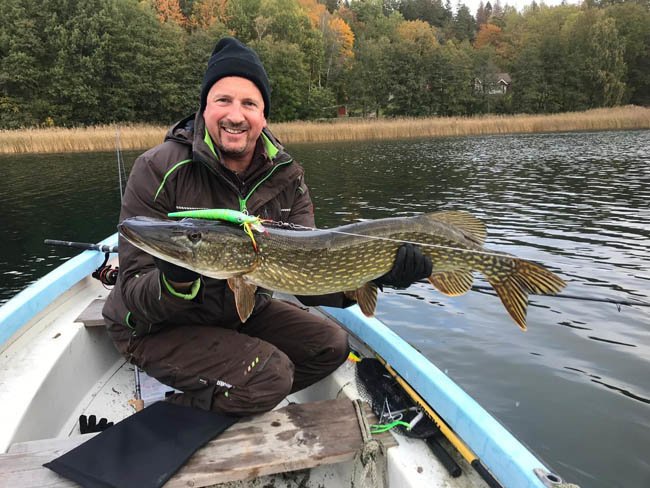
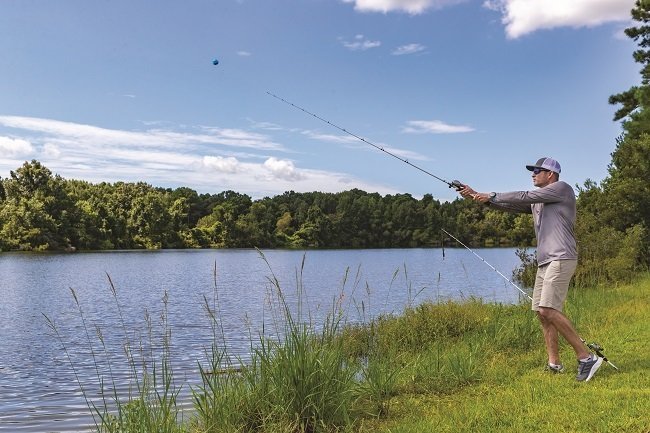
In sum, we quickly get on the trail of our target fish, track it in live view, present our bait targeted to the fish location and test its effectiveness.

And with a little luck we may also observe how the bite takes place.

The repeatedly mentioned individual fish silhouette in close-up on the screen we could not confirm on the water. We did not miss it. It was exciting enough to open a new chapter in recreational sonar technology with the LiveScope system.


Conclusion: As always with new innovative products, it is ultimately the price that determines whether this technology revolutionizes personal sonar habits. With a market price of around 1750€, as a supplement to a network-capable Garmin fish finder/plotter, the “fishing cash box” must be well filled.

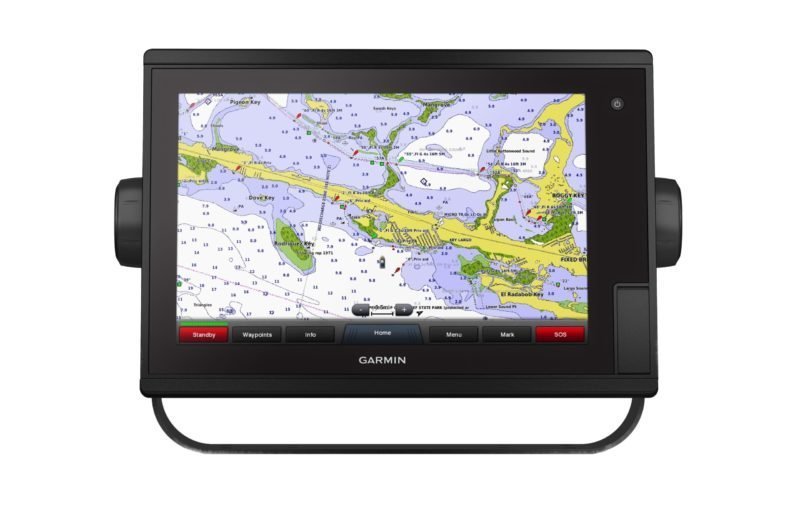
In terms of display size, a 9″ device is probably the lower limit of comfortable working.

A screen with more resolution and dimension than our Echomap 92sv has advantages in detail display and recognition of what LiveScope can work out.

The advantage for the consumer is the possible upgrade of existing network-enabled Garmin Echomap or GPsMap devices with the LiveScope system with unproblematic installation.

This is offset by additional hardware costs and the high energy requirements in mobile use. However, the invaluable advantages of the LiveSope system for the angler are undisputed.

Experiencing the underwater world live, being able to recognize structures in detail, finding the fish with certainty and being able to present your bait directly in relation to the picture are already options that visibly facilitate effective target fish hunting.

Despite the price hurdle, you quickly start to consider this.

Part 2 - Preparing Garmin LiveScope for Mobile Use

All those who use their fish finder mainly in a transportable way, because they are on the way with rental boats or take their device with them at the jetty to protect it from theft, will have already asked themselves how a LiveScope system with all its components can be handled comfortably under these conditions.

We have come up with something for this. The idea is certainly not new, but was adapted in detail to the requirements of the system. Attention: Only for hobbyists with experience!

Basic assembly done: the holes were drilled, switches and sockets attached and wired inside. For the cable feeds from the sonar and the GS10, a 30mm hole would also be sufficient instead of the two shown here.

The basis of the solution is an outdoor plastic case from TomCase (model XT430), which was modified according to our ideas.

Initially, it was decided to use separate power supplies for the black box of the LiveScope and the sonar to ensure independent power supply for both components on all occasions.

Under this premise, there are two separate connection strands in the case. Each strand has an illuminated on/off switch and a waterproof charging socket. This decision allows for different strength batteries in use.

This makes sense, since the black box eats about twice as much power as our 9″ fish finder. Accordingly, we used an 18 Ah Lithium Ion fish finder battery for the LiveScope, and a 9 Ah LiFePo4 model was sufficient for the Garmin Echomap 92sv.

Both batteries weigh around 1 kg individually, so there were no problems with weight distribution in the case despite different performance.

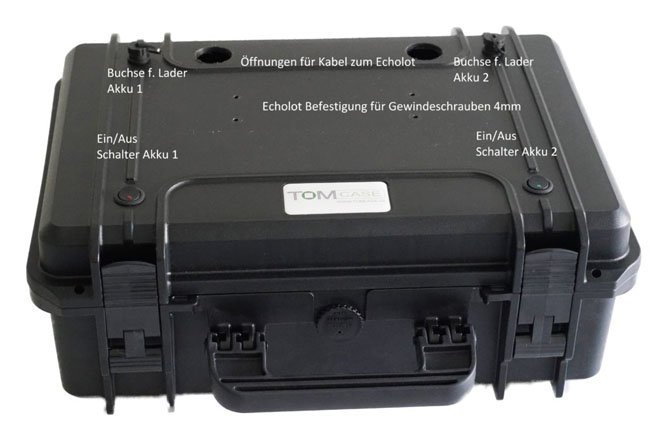
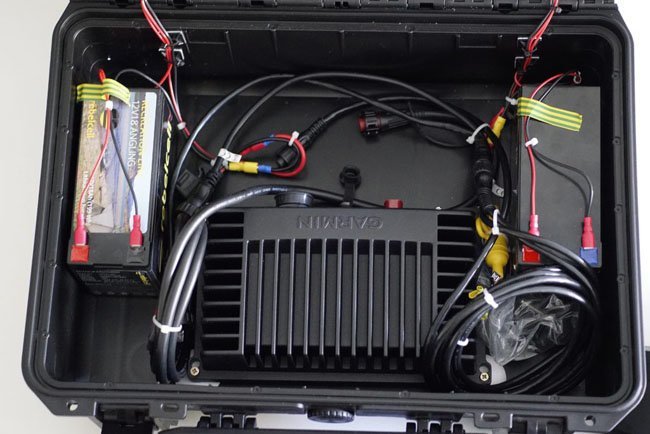
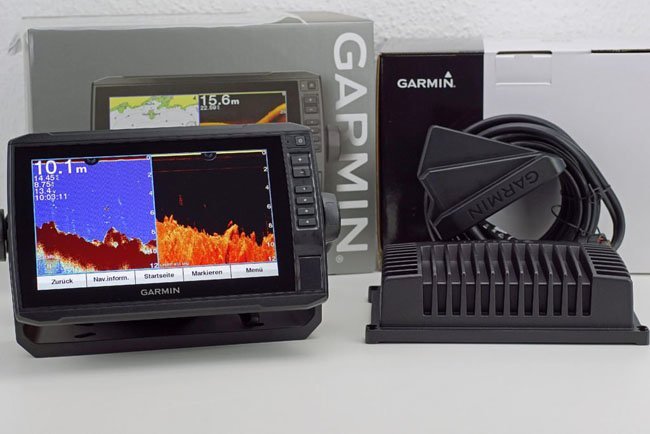
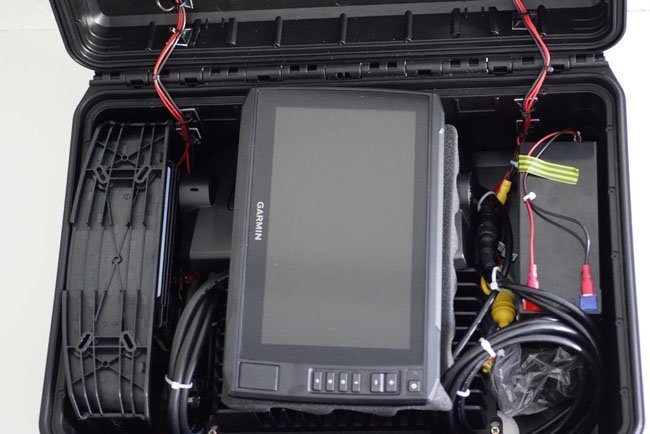
A look inside the case. The black box and fish finder batteries are attached, both power supplies are attached, and the excess cable lengths are stored. For use on the water, the only thing left to do here is to insert and attach the transducer cable.

For assembly, first mark all the holes that need to be drilled in the case lid.

Our charging sockets needed 12 mm, the rocker switches 16 mm and for the cable runs to and from the fish finder 30 mm openings are needed because of the thick connectors.

For the latter, you should use a hole saw (drill). 12 and 16 mm can be opened with a 10mm wood drill (if you do not have a larger), and then easily expand with closed household scissors (insert and then turn).

For the wiring, first solder two stranded wires (red =+(pin 1), black= – (pin 2)) of sufficient length to the charging sockets.

The soldered joints are then covered with heat shrink tubing for insulation. Then the switches and charging sockets are installed in the housing and additionally fixed from the inside with hot glue.

Next, all components are wired according to the sketch. Flat plug sockets (partially insulated, 4.8 mm and 6.3mm) are suitable for plug connections.

If two cables have to be inserted, the yellow versions are used, for one cable the red. All flat plugs are applied with a crimping tool (as usual in automotive engineering).

If you want to be absolutely sure, you can still attach the contact points in the socket with solder. Finally, all sockets are fully insulated with heat shrink tubing (9 mm). The connection diagram shows what is plugged in where.

Garmin-panoptix-LiveScope-instal
The wiring diagram is easy to execute with the appropriate basic electrical knowledge. Only four soldering points are required at the charging sockets, all other access points are crimped. However, if there is a high need for safety, the cable ends in the connectors can be additionally soldered before applying the heat shrink tubing for insulation.

The black box is now securely fastened in the case. As a mounting aid serve, for example, self-adhesive round door stoppers (40 mm), which at a height of 12 mm bring enough lining to fix the black box on them with 20 mm long wood screws.

The batteries must also be fixed so that they do not take on a life of their own during transport. We used self-adhesive double Velcro tape (20 mm wide). This holds the battery securely to the bottom of the case and allows it to be removed and reinserted at any time should the need arise.

The power cables of both devices have a device fuse and loose cable ends to which flat plugs matching the sockets are applied. Now the final assembly can begin.

The excess cable lengths remain in the case and we close the 30 mm openings after the transducer is connected to the black box with a modified 30 mm rubber plug from the car accessories.

Garmin-panoptix-LiveScope-transport-box
All necessary parts of our system incl. bracket can be packed into the case for transport. The only thing missing here is the fish finder cover and a piece of foam to secure it and you're ready to go. The filled box weighs about 6.5kg in transport. The transducers are transported mounted with the transducer rod. This unit fits nicely into a larger rod bag.

For transport, all the technology, including fish finder and mount, fits in the case.

For use, you only need to screw the bracket of the fish finder on the case (goes with wing nuts uncomplicated and fast), make the connections and the unit is ready to work.

In order to be able to charge the batteries, we are still missing the appropriate plugs for our charging sockets, which are attached to the charger connections.

If you want to remain flexible in the connection variants with your charger, make an adapter with a flat plug connection as shown in the illustration, then you can change the connection variants as needed.

With a stable transducer rod (e.g. from Kaiser or Scrubbes), mounting both transducers (LiveScope and fish finder transducer) is no problem.

You only need a 20 cm short aluminum strip as a mounting aid (adapter), in which six drill holes are made. In this way, both transducers can be conveniently attached. The connecting cables to the case are fixed at the bottom of the bar with cable ties.

In practice, both transducers worked in parallel without any problems. In terms of handling, the unit was set up very compactly and hardly differed from a single solution. Only the double cable routing makes a small difference. 

Garmin-panoptix-LiveScope-transducer-adapter
Here nicely to see: The self-made adapter in the form of a 2 mm thick aluminum plate (200 mm x 40 mm) is attached to the base plate of the transducer rod. Both transducers can be attached to it perfectly. The different transducer constructions become clear in the front view.

Disclaimer

This article is only a description of a project we conducted on this field test.

We do not assume any liability or guarantee for the conclusiveness of the planning, the construction and the functional reliability of the final product. Whoever uses the description for the reproduction of a similar project does so at his own risk. Any liability on our part is excluded.

Important note

All electrical work and installations should only be carried out by qualified persons who have the necessary expertise to carry out such work properly. 12V batteries or accumulators are not toys and, if handled incorrectly, are a serious source of danger for serious personal injury and damage to property.

Parts list/tool
  • 1x Tomcase Xt430 (external dimensions (WxHxD) approx. 464x366x176 mm)
  • 2 x rocker switch with LED 16mm installation
  • 2 x panel jack 2-pole solder connection
  • 2x plug for panel jack 2-pole solder connection
  • 3m automotive stranded wire red 1-1,5mm²
  • 3m automotive stranded wire black 1-1,5mm²
  • 4 pieces flat plug socket yellow 4,5mm
  • 2 pieces flat plug socket yellow 6,3mm
  • 6 pieces flat plug socket red 4,5mm
  • 2 pieces flat plug socket red 6,3mm
  • 4 pieces flat plug red 6,3mm
  • Heat shrink tubing 0.5m 0.9mm
  • Heat shrink tubing 0.2m 0.2mm
  • 10 pieces adhesive base 20x20mm
  • 4 pieces of bum sins 40mm (12mm high)
  • 1m double hook and loop tape with adhesive back 20mm
  • Aluminum strip 200x40x2(mm)
Garmin-panoptix-LiveScope-instal-accessories
Some of the small parts needed. The mentioned adapter for the installation charging sockets in the flat plug solution can be seen on the right.

Tools: soldering iron, solder, crimping pliers, hot-air gun, drill, locksaw 30 mm, wood drill 10 mm, big scissors, hot-glue gun

Read here: Our big fish finder review – which is the best fish finder for fishing?

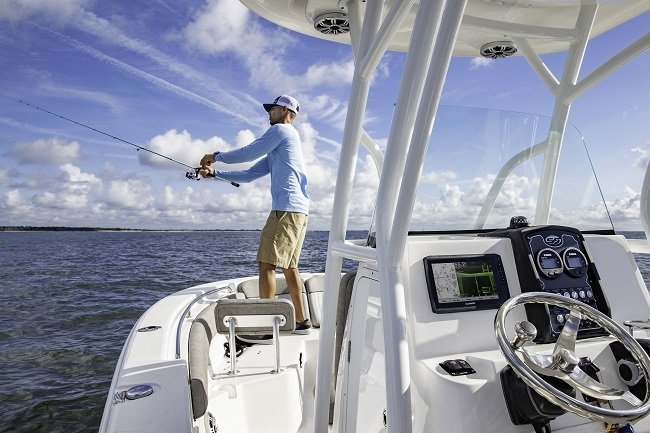
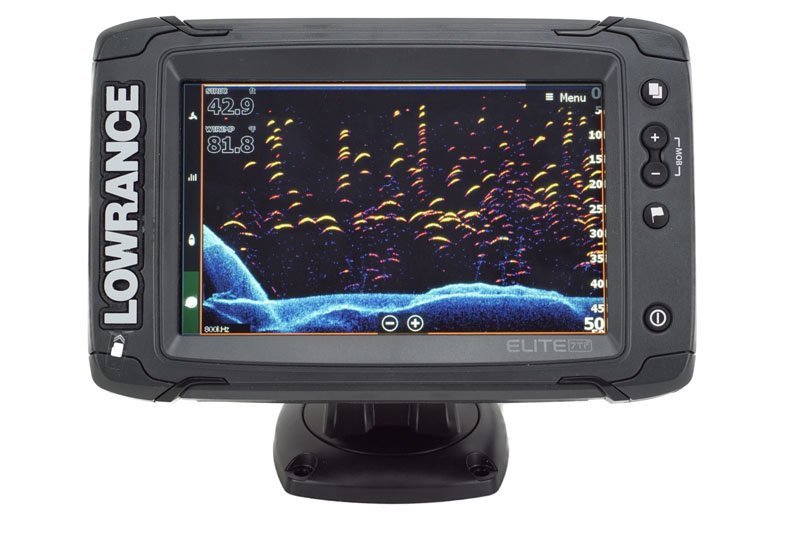
This brings us to the end of our detailed test-review of the Lowrance Elite 7 Ti Chirp fish finder sonar and chartplotter. If you have any questions, additions or comments, please let us know – we are looking forward to your feedback – or have a look at the other fish finder reviews in our extensive fish finder test (including the newest models of all important fish finder manufacturers like Garmin, Lowrance, Humminbird or Raymarine). Have fun on your next fishing trip and “Petri Heil”! – Martin and Jens.

Could you take 1 Click to share your experiences?

We will be forever grateful. With your rating we can improve.

average rating 4.7 / 5. Number of ratings: 88

Be the first to rate this post!

Related : More From Author

No products in the cart.

Select your currency
EUREuro
0
Loading...